目录
Measuring audio decibels with an audio decibel meter is a straightforward process. Here’s a step-by-step guide to help you get started:

Step 1: Choose the Right Audio Decibel Meter
Before you can measure audio decibels, you need to select an appropriate audio decibel meter. There are various models available, ranging from basic handheld devices to advanced professional-grade meters. When choosing a meter, consider the following features:
Frequency Weighting: Most meters offer A-weighting (dBA) and C-weighting (dBC). A-weighting is commonly used for general sound measurements, while C-weighting is better for measuring low-frequency sounds.
Measurement Range: Ensure the meter can measure the range of decibels you expect to encounter.
Data Logging: Some meters can record measurements over time, which is useful for monitoring changes in sound levels.
Step 2: Prepare for Measurement
Once you have your audio decibel meter, it’s time to prepare for measurement. Follow these steps:
Calibrate the Meter: Before taking measurements, calibrate your audio decibel meter according to the manufacturer’s instructions. This ensures accuracy.
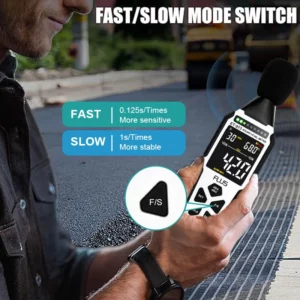
Select the Measurement Mode: Choose between fast or slow response modes depending on your needs. Fast mode captures quick changes in sound, while slow mode averages out fluctuations over time.
Position the Meter: Hold the audio decibel meter at arm’s length, with the microphone facing the sound source. For more accurate readings, position the meter at ear level.
Step 3: Take Measurements
Now that you’re ready, it’s time to measure audio decibels:
Start the Measurement: Press the measurement button on your audio decibel meter to begin recording sound levels.
Observe the Readings: Watch the display for the current decibel level. If you’re monitoring a fluctuating sound, take note of the peak levels as well as the average.
Record Your Data: If your meter has data logging capabilities, save the measurements for later analysis. If not, jot down the readings manually.
Step 4: Analyze the Results
After taking measurements, it’s essential to analyze the results. Consider the following:
Compare to Safe Levels: Refer to established guidelines for safe sound levels. For example, sounds above 85 dB can be harmful with prolonged exposure.
Identify Patterns: If you’re monitoring a specific environment, look for patterns in the data. Are there times when noise levels spike? This information can help you make informed decisions about sound management.
Step 5: Take Action
Based on your findings, you may need to take action to manage sound levels. Here are some strategies:
Soundproofing: If you’re dealing with excessive noise in your home or office, consider soundproofing solutions such as acoustic panels or soundproof windows.
Regulate Noise: In work environments, implement policies to limit noise exposure and provide hearing protection for employees.
Educate Others: Share your findings with colleagues or family members to raise awareness about the importance of monitoring sound levels.
Conclusion
Whether you’re a professional in the field or someone interested in sound management, understanding how to measure audio decibels will empower you to make informed decisions about noise control.
0


